Raising the Roof

Once the cladding was finished, and the windows were in, there were some final trim pieces that we needed to install as part of the roof. Each window needed what is called a ‘header flashing’ installed above it. This piece is custom fit for each window. The header flashing locks in to the cladding piece above it and sits just above the top rim of the window, allowing water to drain out and over the edge of the window. The ridge cap for the peak of the roof, and the side caps were also installed. Now, every piece of the exterior is complete! We finally have a waterproof house!

Completing the exterior was the biggest relief of this whole process. Now, we don’t wake up every night that it rains or is windy, worrying about whether or not the tiny house is ok. We no longer needed to worry whether or not rain was leaking into the house, or if the wind was ripping off our cladding. We can now sleep peacefully knowing the house is safe and sealed up. Well, minus the fact that we don’t have a front door yet…

20160421_171028

Advertisement

Window to my heart <3

Our windows are here and they are gorgeous! We had them custom made to our specs by Kurt from Nulook. I love the matte black finish, its perfect. Here in New Zealand, it is actually a big deal if you have double pane windows. It didn’t seem like much to Ness, as she is so used to double panes in America. But here in New Zealand, you actually pay more to have ‘double glazing’ as they call it, and it is virtually a luxury. We didn’t really see that we had any other option. It is crucial that the tiny house is well insulated and as energy efficient as possible. Although there is no extreme weather here, and the insulation is not as significant as somewhere that does get the extremes, single glazing would have collected moisture on the inside which can lead to so many problems down the road. The other point of a tiny house is that it is cheap to heat and cool, and we honestly did not see single glazing as an option.

Installing the windows was a pretty simple task, but a big one for so many short people. Jess’s sister Kim was in New Zealand for a few weeks while she was traveling the world, so of course we had to ask her to throw in a couple extra hands to help. Kim is a towering 4 foot 11 inches tall and clearly the best person to recruit to help install our windows 4 meters (13 feet) up. We also recruited the help of Tursha, Ness’s Mother In-Law who is also a whopping 5 feet tall. We borrowed the scaffolding from a neighbor but it was still a stretch for some of the bigger and heavier windows. I’m still not sure how we managed, but girls rule and we did it all on our own! These truly are the windows to our hearts as we are truly grateful to the help that Kim and Tursha gave us that day, we couldn’t have done it without them! Thanks, ladies!

Clad Me, Clad You, Clad Who?

Honestly, this cladding was the most difficult part of this whole process. The aluminum cladding that we chose was actually pretty easy to install, if we are talking about the small pieces. This cladding, unlike most cladding, has to be installed from the top down. So, based on where we knew we needed to end up at the bottom of the trailer, we had to do the math to figure out exactly which point to start at the top, and hope that if we kept each piece straight, we would end up where we needed to be by the time we got to the bottom. These sheets are about 0.7 mm (0.028 inches) thick by 7.8 meters (25 ½ feet) long and difficult to install on a day with even the slightest hint of a breeze. Other pieces were shorter, depending on where they were on the tiny house. Each piece interlocks at the top with the piece before it and is secured along the bottom edge and the sides. After what we thought would be one very long weekend of cladding from sun up to sun down, we still needed an additional week to complete the project. When we were done, we were so proud of it though, and it looks fantastic!

The next step was to complete all of the outer edge trim, the finish work. Each corner, or exposed edge where a window would be, or where the roof came down to match the cladding had to be trimmed out with corner pieces and riveted on. In Bruce’s words, this part, although intricate and detail oriented, was a, “Piece of piss.” This finish work was so much easier than fretting about fitting those big cumbersome pieces of cladding. Next up, we get to fit the windows!


Clad Me!!

While trying to figure out our options for siding, or as they like to call it in NZ, cladding, we came down to two options we really liked. These two options were wood weatherboard cladding and steel cladding. There are many different looks that can be achieved with both materials so the options were virtually endless. After much thought, we decided to go with steel cladding to reduce the overall weight. We absolutely love the look of wood cladding; however, reducing the overall weight of our trailer is always our first priority. We went off to Quins a local cladding warehouse in good ole Levin and met the wonderful Bruce. Bruce has easily been our favorite person throughout this whole project. We explained to him that this was a learning process for us and that we were not completely familiar with metal cladding installation and Bruce assured us that we should not worry, it would be a “piece of piss.” So we decided to give it a go and picked both the profile that we wanted and the colors that we wanted. We went with a standard corrugated roof in white, and a really cool panel-look in a deep gray for the siding. Before we received our materials, Bruce asked to meet with us to give us a few tips and tricks of the trade to hopefully make our lives and this job easier.

The cladding and windows have arrived! (Bruce, below)

20151218_110529 20151218_111137 20151218_144321

The materials looked like a huge intimidating jigsaw puzzle, which we could not wait to get started on. So here it goes, piece of piss…

20160105_204359 20160110_185145 20160110_185236

Bloody aaaaRRRRRRghhhhhhh-Board!

When we received our frame from Frametek, they recommended to us that we needed to use a thermal break as a layer between our frame and our cladding. You may be thinking what we thought….. What the heck is a thermal break?! A thermal break is an extra barrier with low conductivity placed between two conductive materials to reduce or prevent the flow of thermal energy. This helps protect us from any excess moisture, and also adds to the overall insulation or R-value of the tiny house.

We used R-Board Plus as a thermal break as recommended by Frametek. This stuff was a pain in the ass!!! This was mainly because it is so windy here on the Kapiti coast, and it just wanted to take off like a sail. It has 10mm of insulation and building wrap on top. It may be a bit of overkill for a tiny house, but we will definitely appreciate it down the road!

Here are some snaps:

Mammoth Board….  :/ NEVER again!

We used Mammoth Board as a thermal break between the frame and the corrugated roof. The material is actually similar to very thick polyester. This was a pain in the ass to cut and fix to the steel, as it would get spun up in our screws and would not allow our self tapping screws to go through to the metal.  To be completely honest, we wouldn’t recommend it and we would NEVER use this again after this experience. Ness seriously cursed the whole time! It was a very time consuming process, but we got through it with a little help from our friend Jessie visiting for Christmas all the way from Missouri! Thanks Jessie 🙂

Outings to Frametek

After much going back and forth we eventually finalized our plans! Ness had the awesome opportunity of going into the warehouse to watch our tiny house frame being produced. Steve at Frametek gave her a tour and provided her with all the ins and outs as to how everything works. As a science nerd, Ness was totally nerding out.

After the frame was produced we impatiently waited about a week for the rain to stop, so that it could be assembled and fixed to the trailer. The day finally arrived!!! When we got the call we headed straight to Frametek to watch the proceedings 🙂


Watching our tiny house being assembled was a very surreal experience, and even more surreal driving it away!

Let the Games Begin!!!

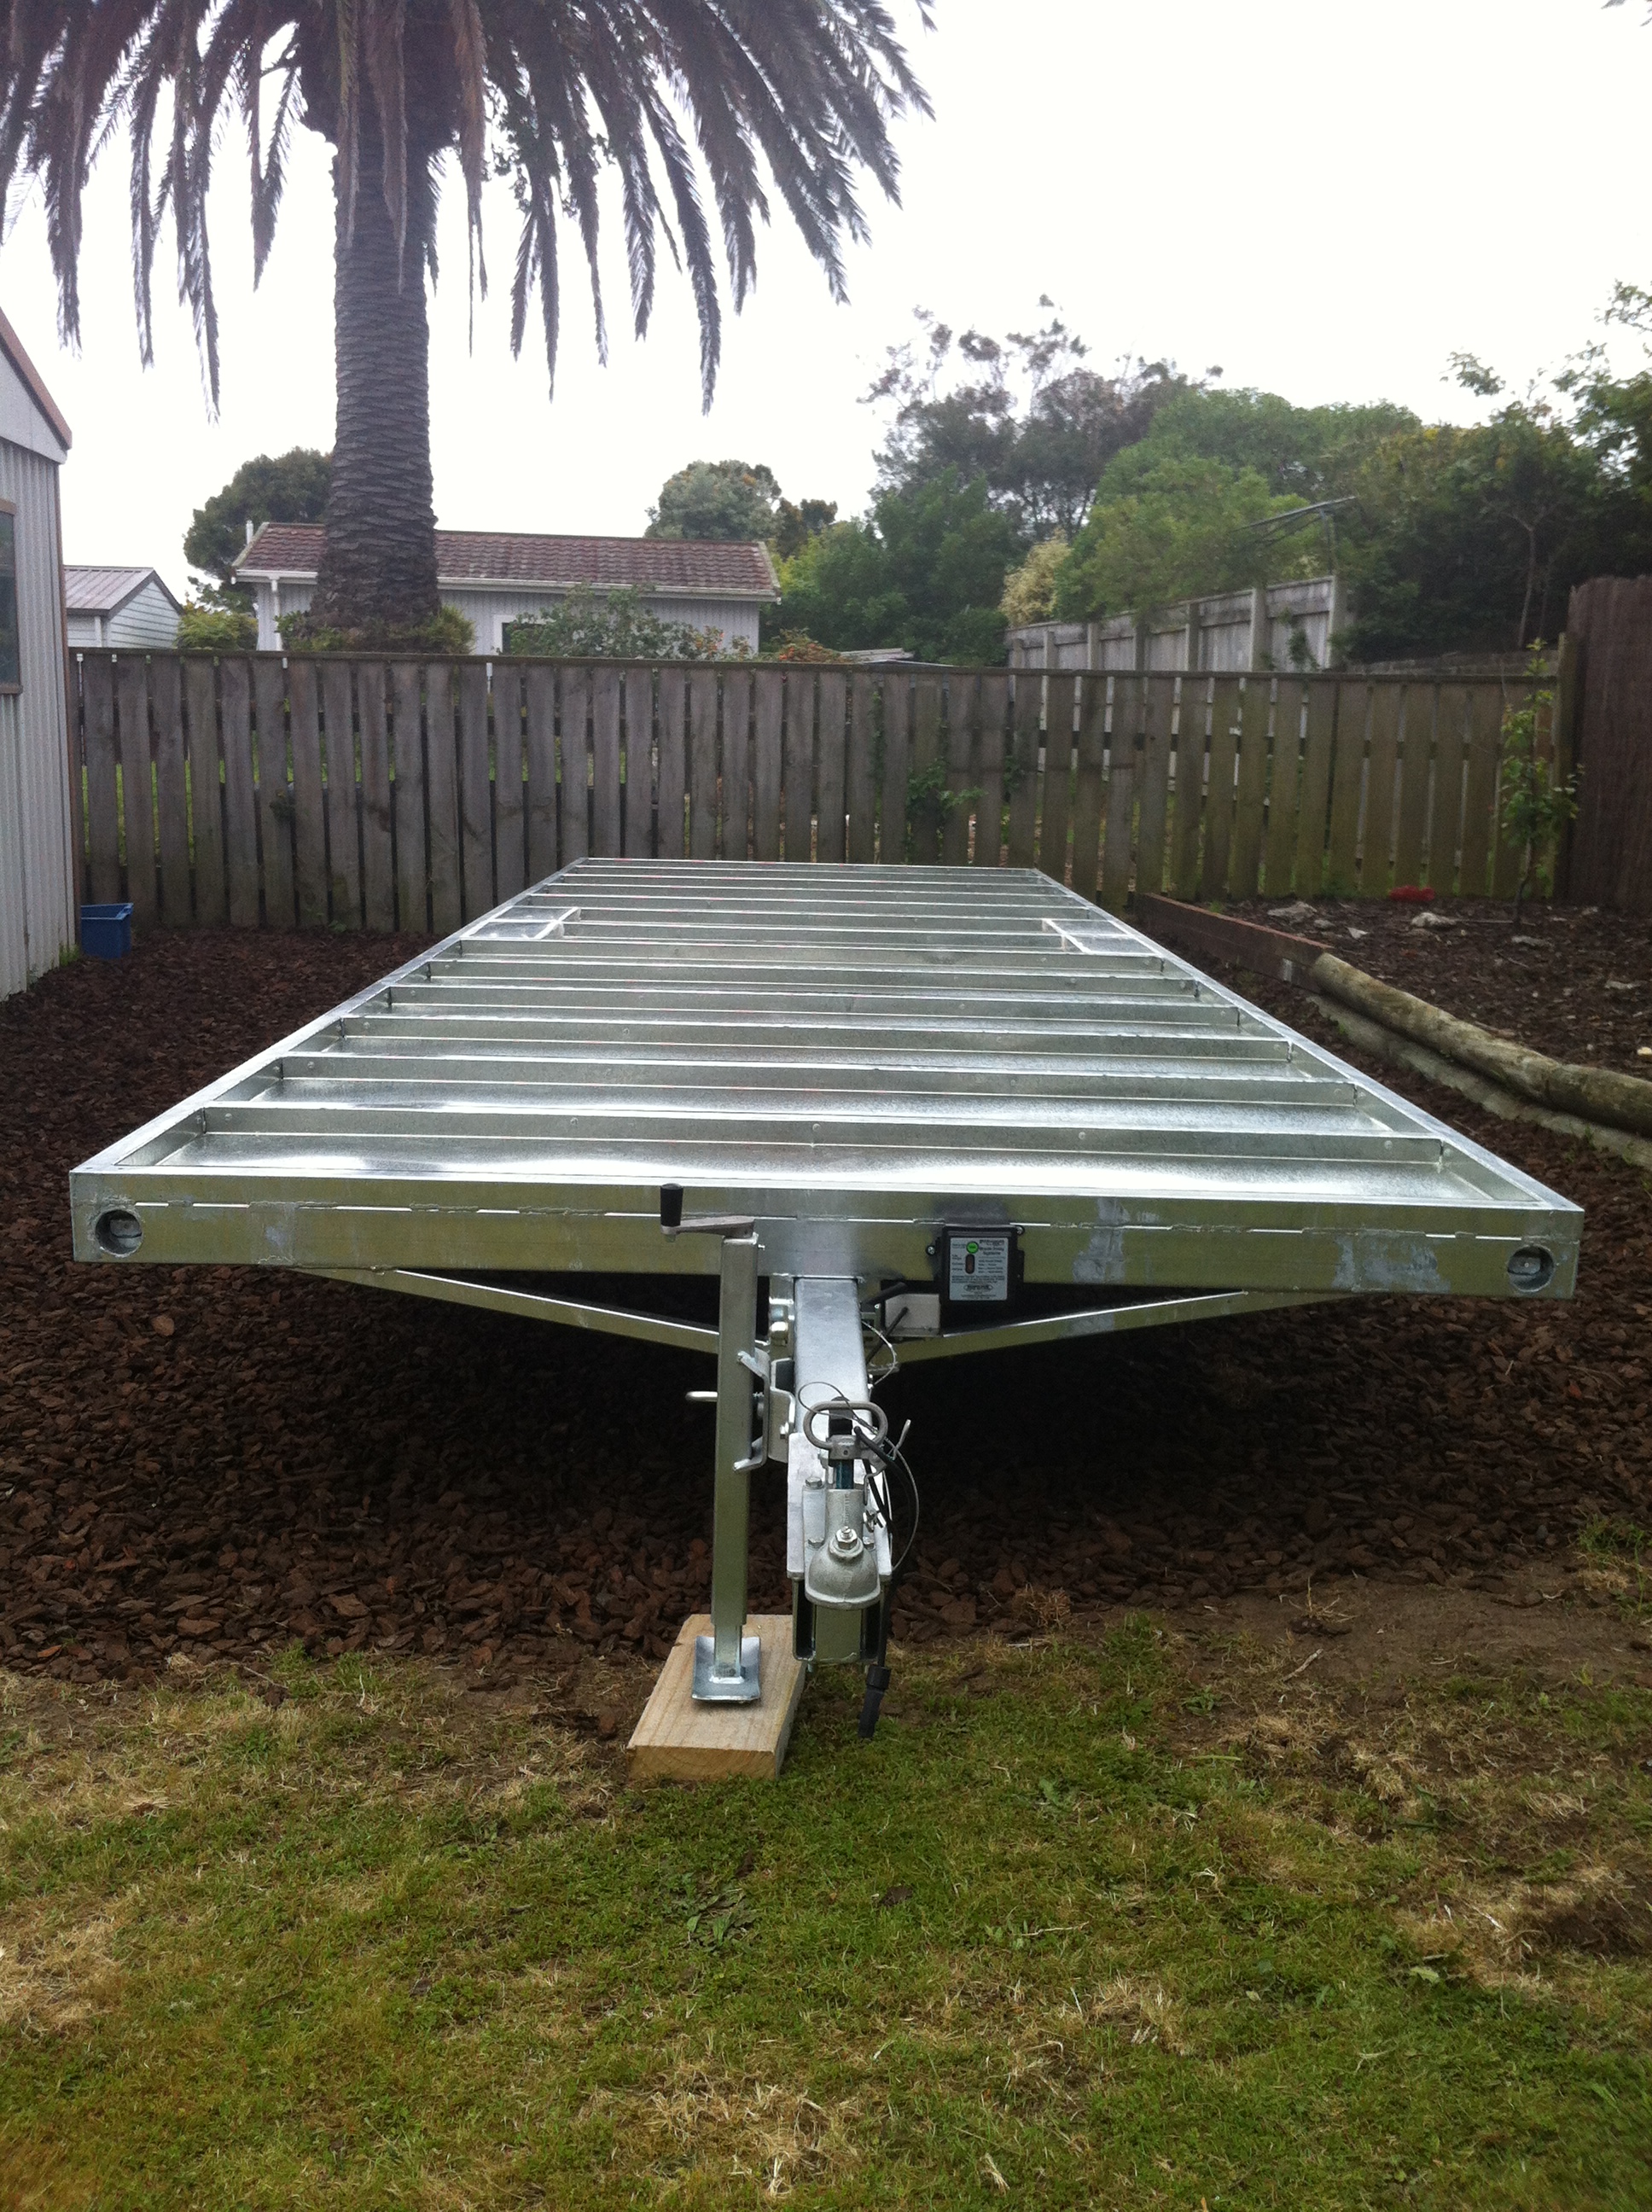
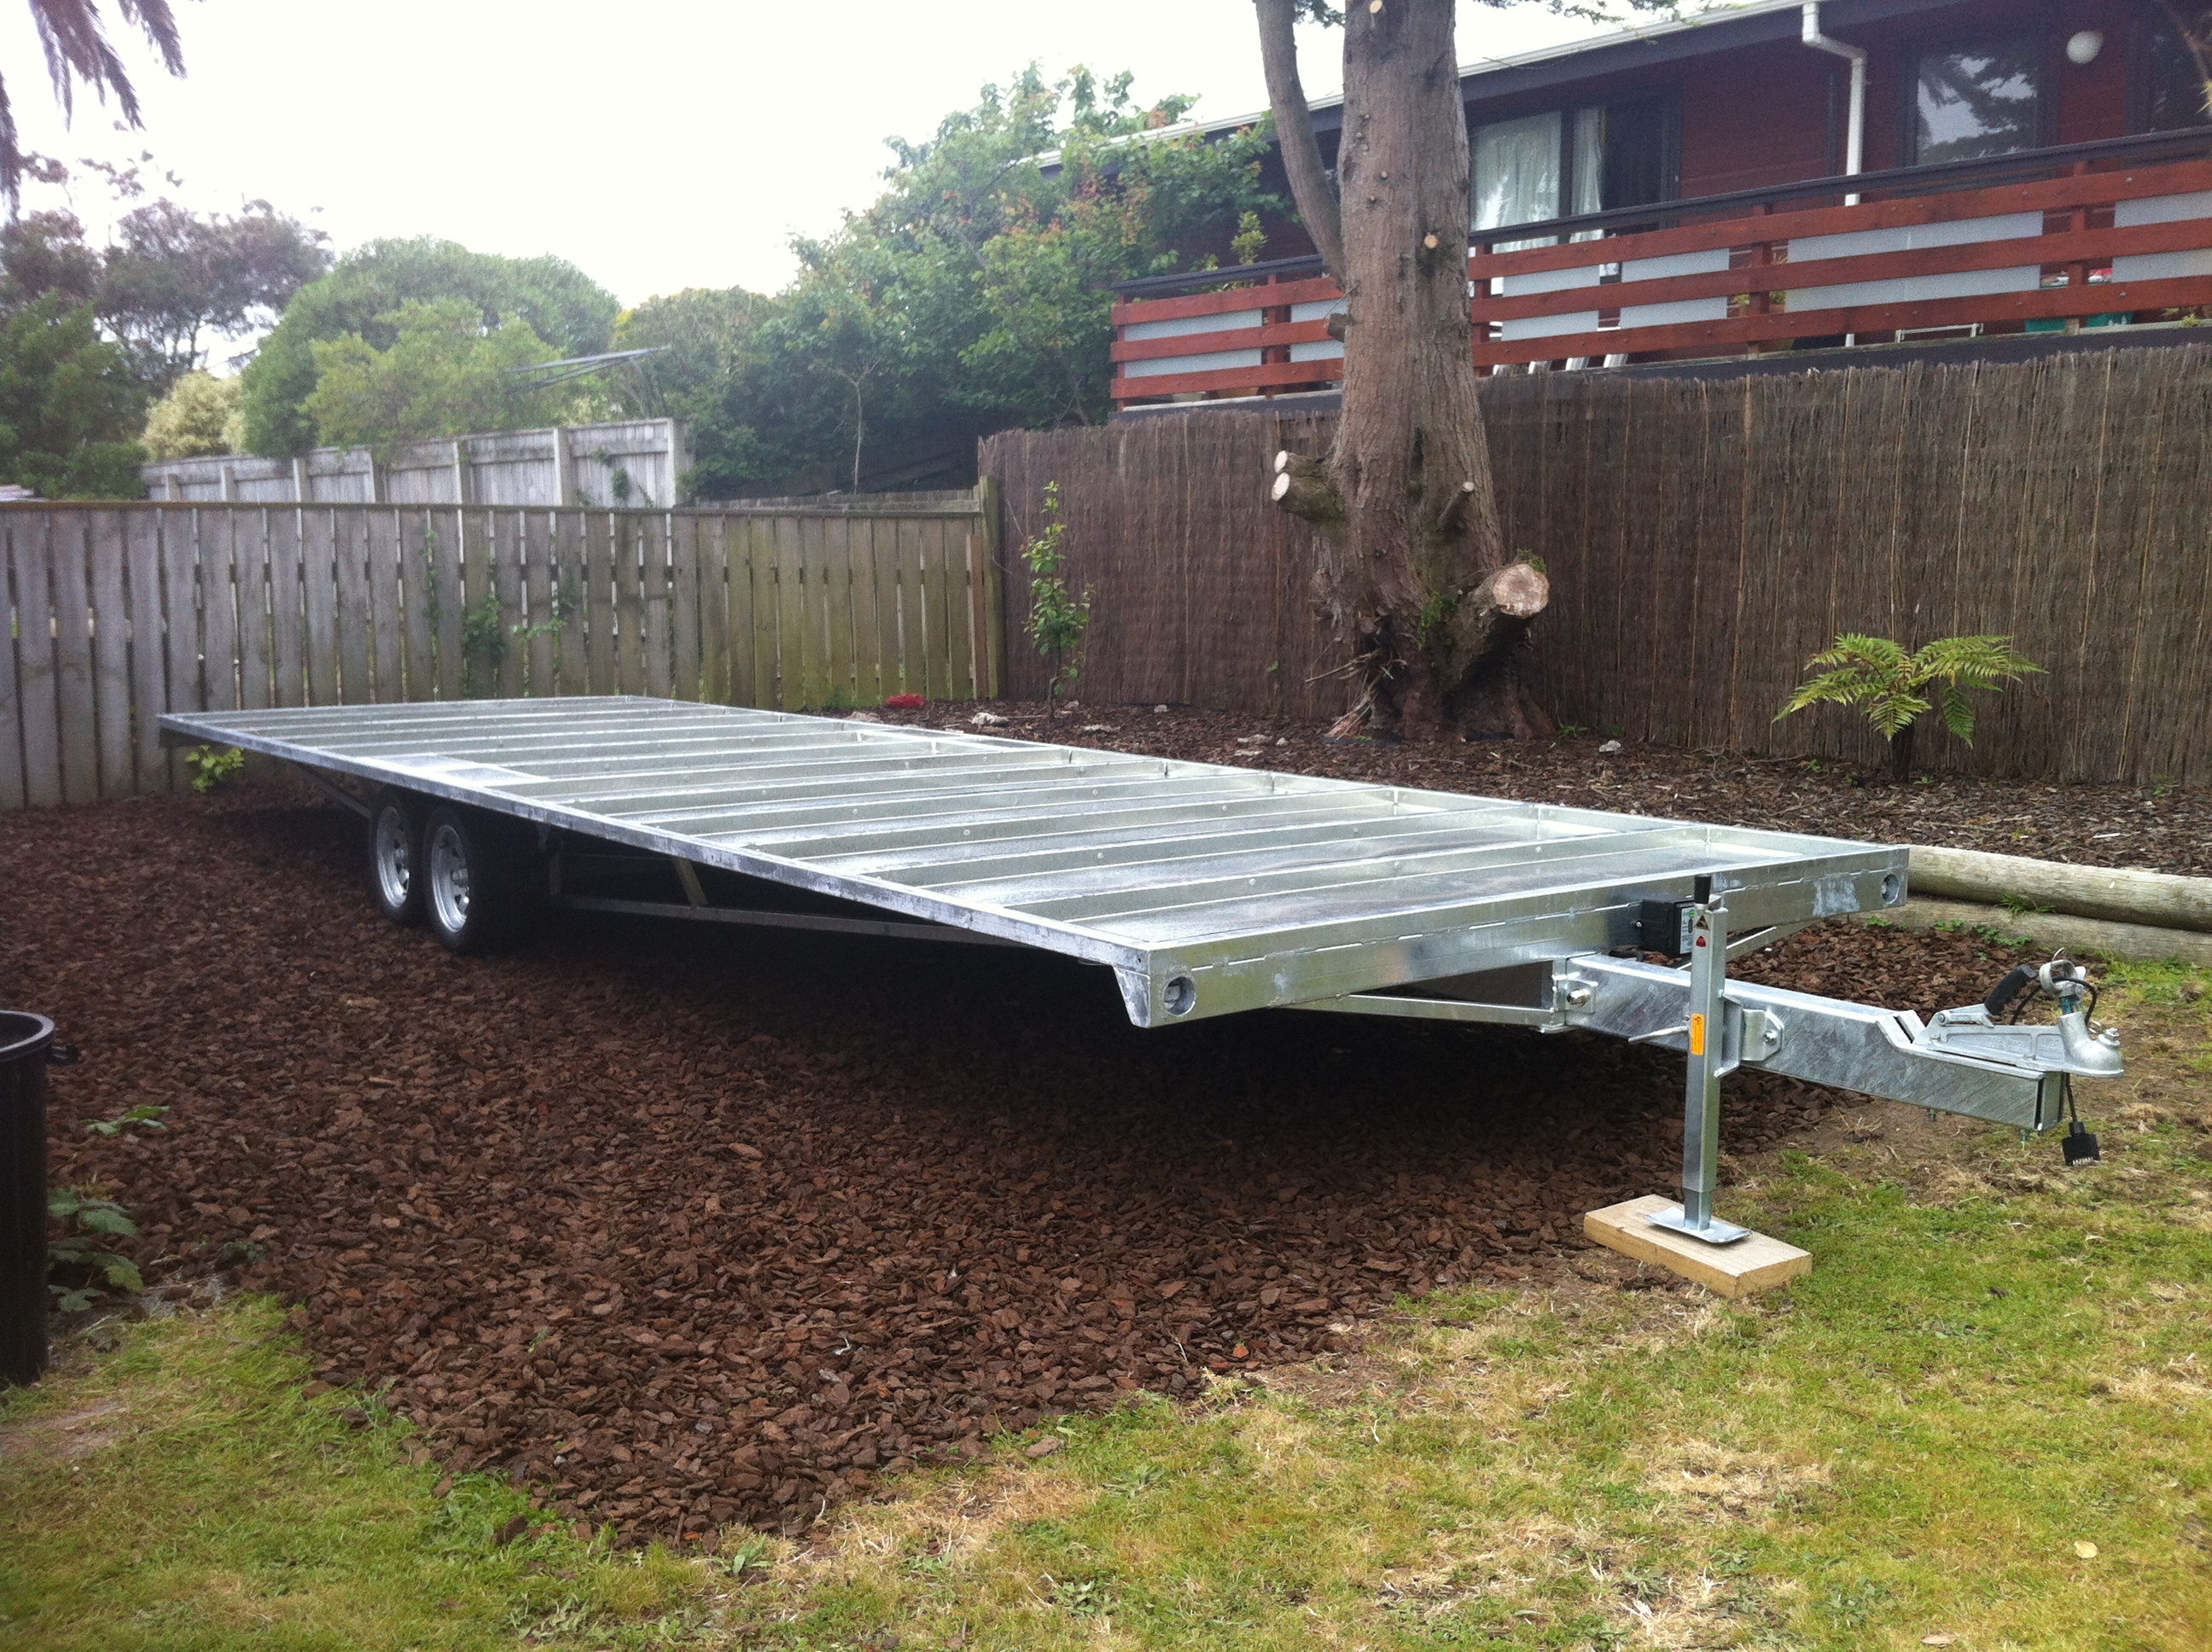
After some interesting battles with the rain lately, we finally found a few sunny days to get some work done! After receiving our tiny house trailer earlier this month, we have been hard at work. We made one big trip to Placemakers (our local hardware store) and bought all of our polystyrene insulation for our floor, along with plywood for the subfloor.

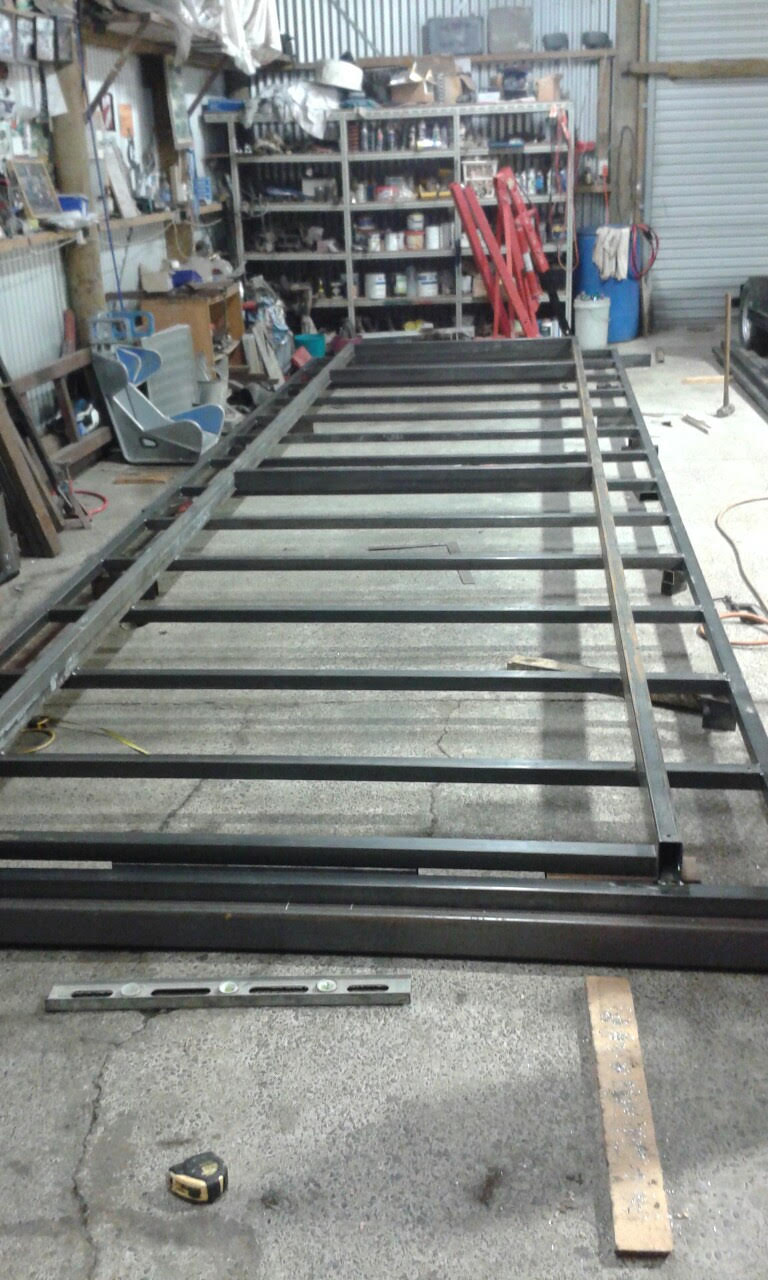
Most tiny houses we have seen have constructed a subfloor and set it on top of the trailer. Since we did not want to lose any height in our design, we decided to have galvanized sheeting mounted to the trailer, and just use the trailer as the subfloor to save on space, weight, and lumber costs. After purchasing the supplies we needed, we headed home and got straight to it. All of the polystyrene needed to be measured and cut to fit perfectly between the crossbeams of the trailer. We made sure to cut all pieces to squeeze in perfectly, while still leaving some depth for the polystyrene to breathe under the plywood subfloor.

Once all of the polystyrene was in place, we were losing daylight and decided to stop for the night.

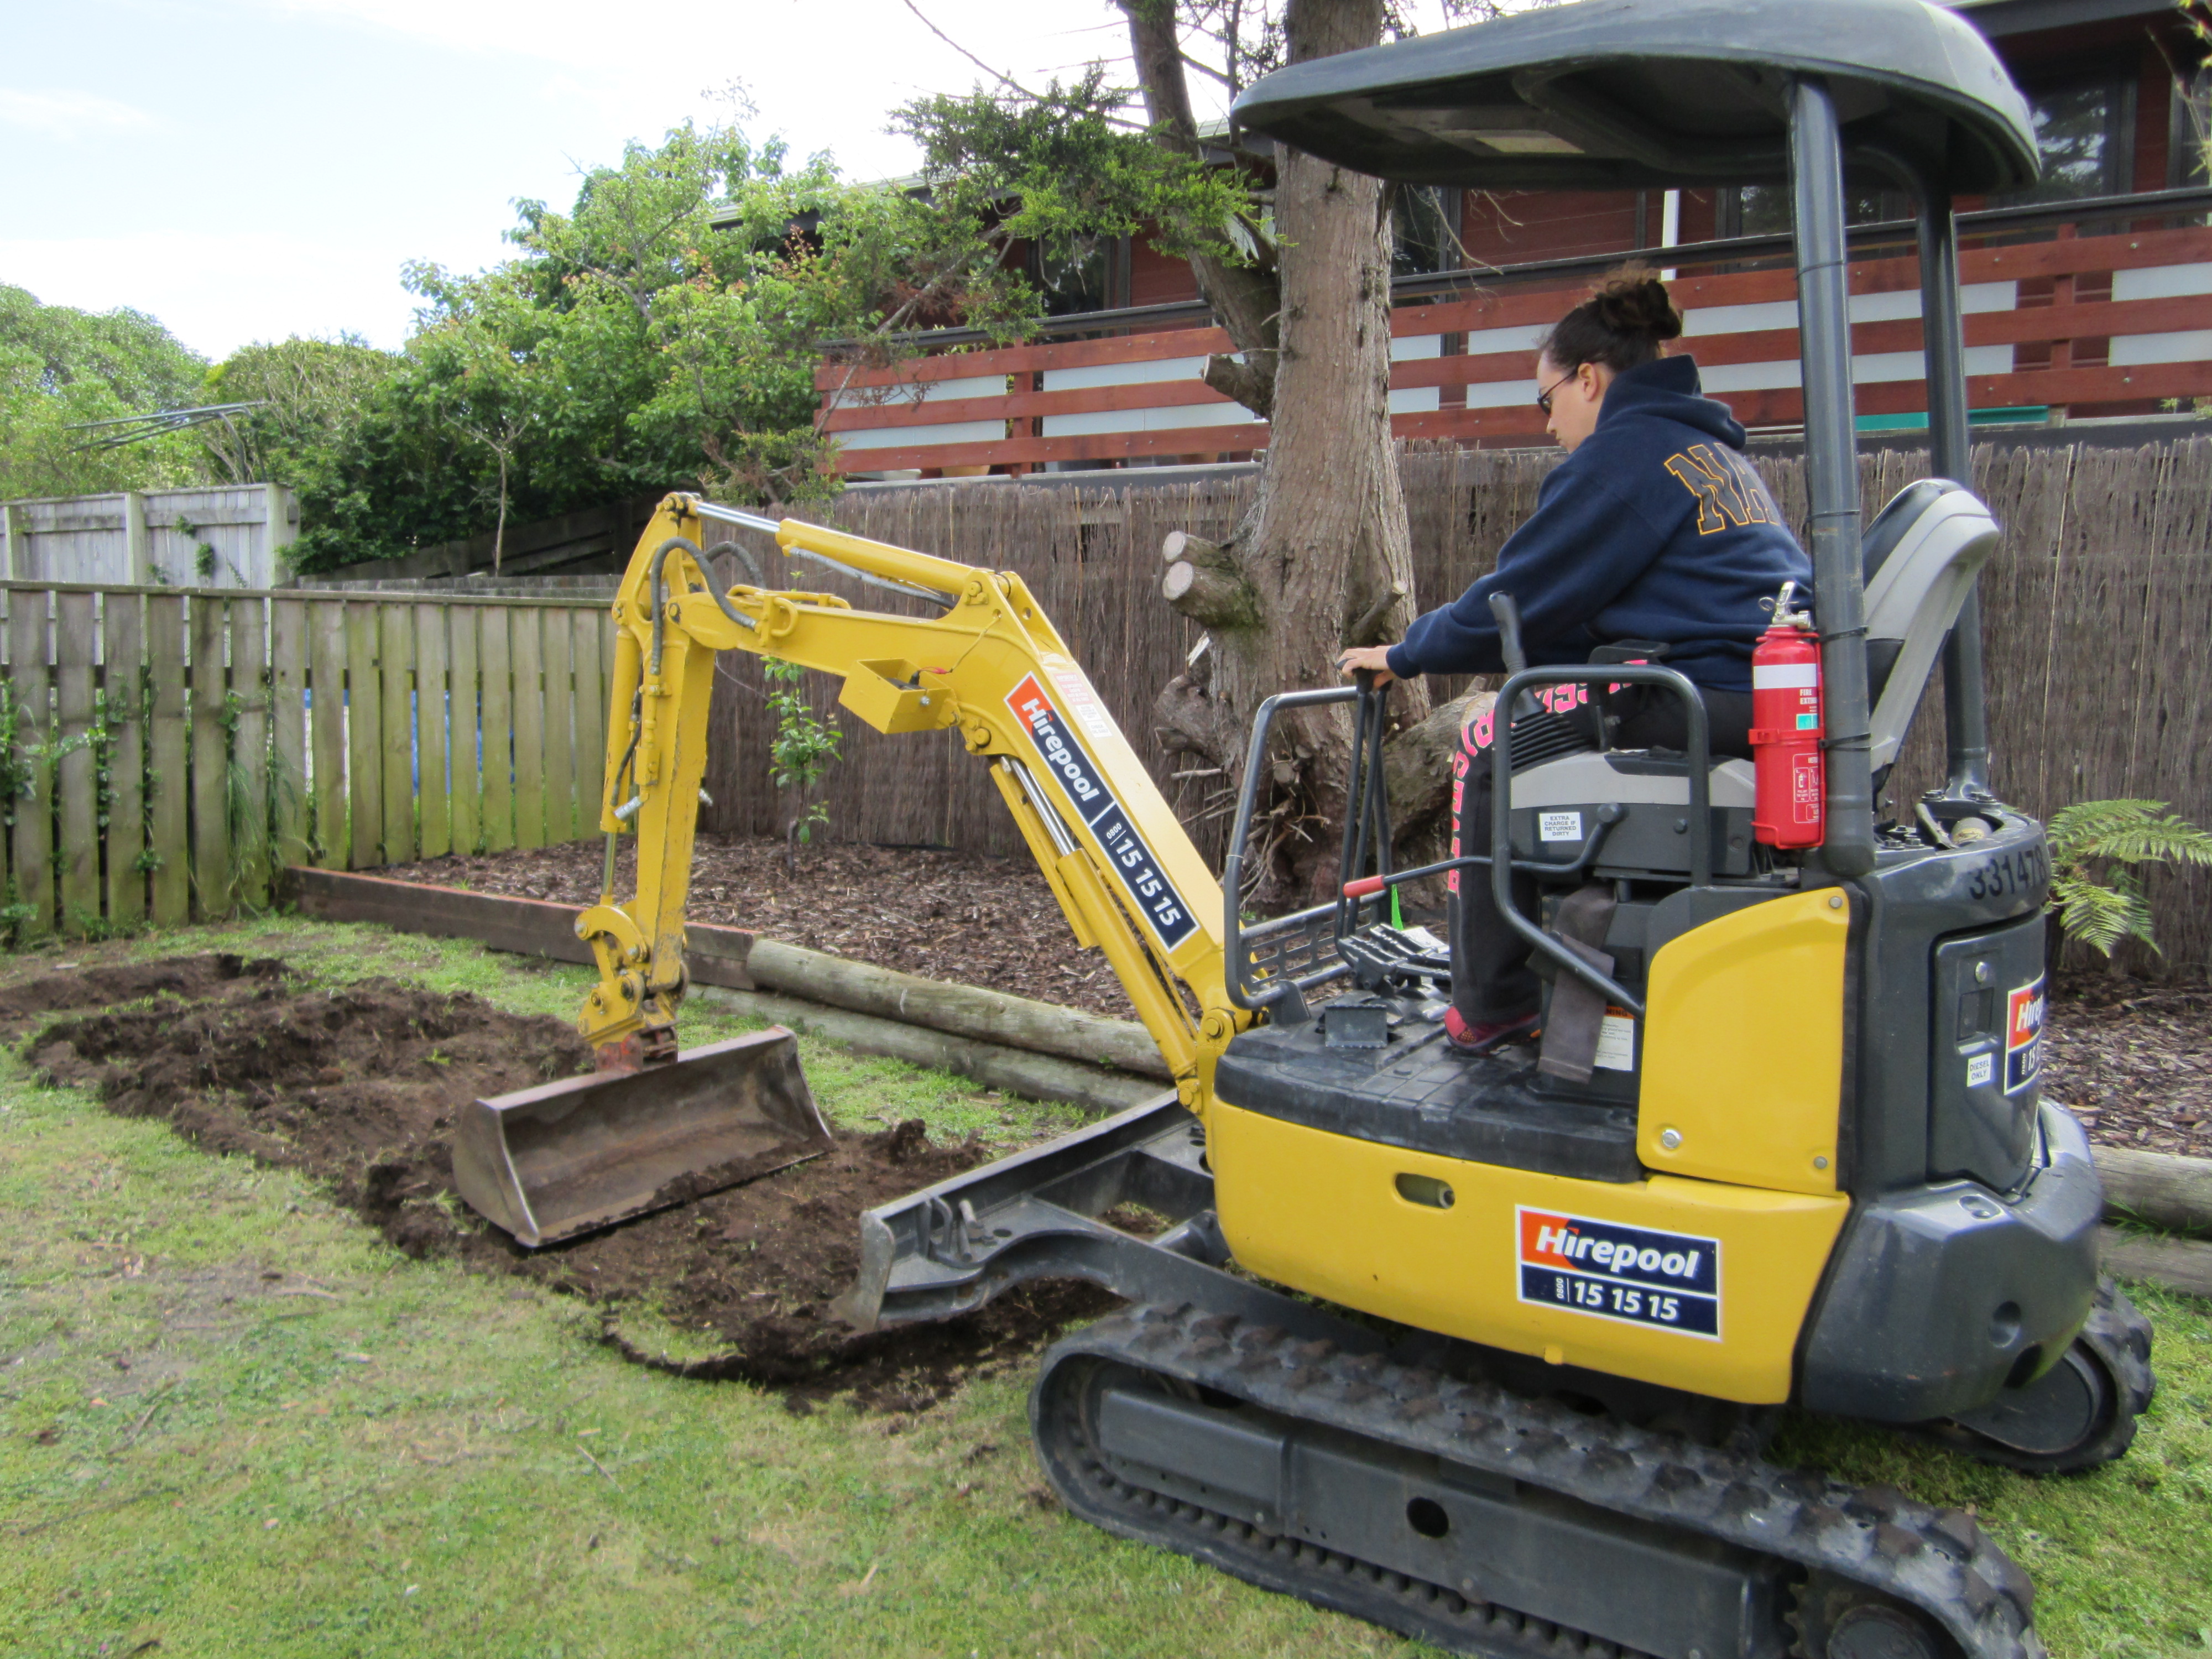
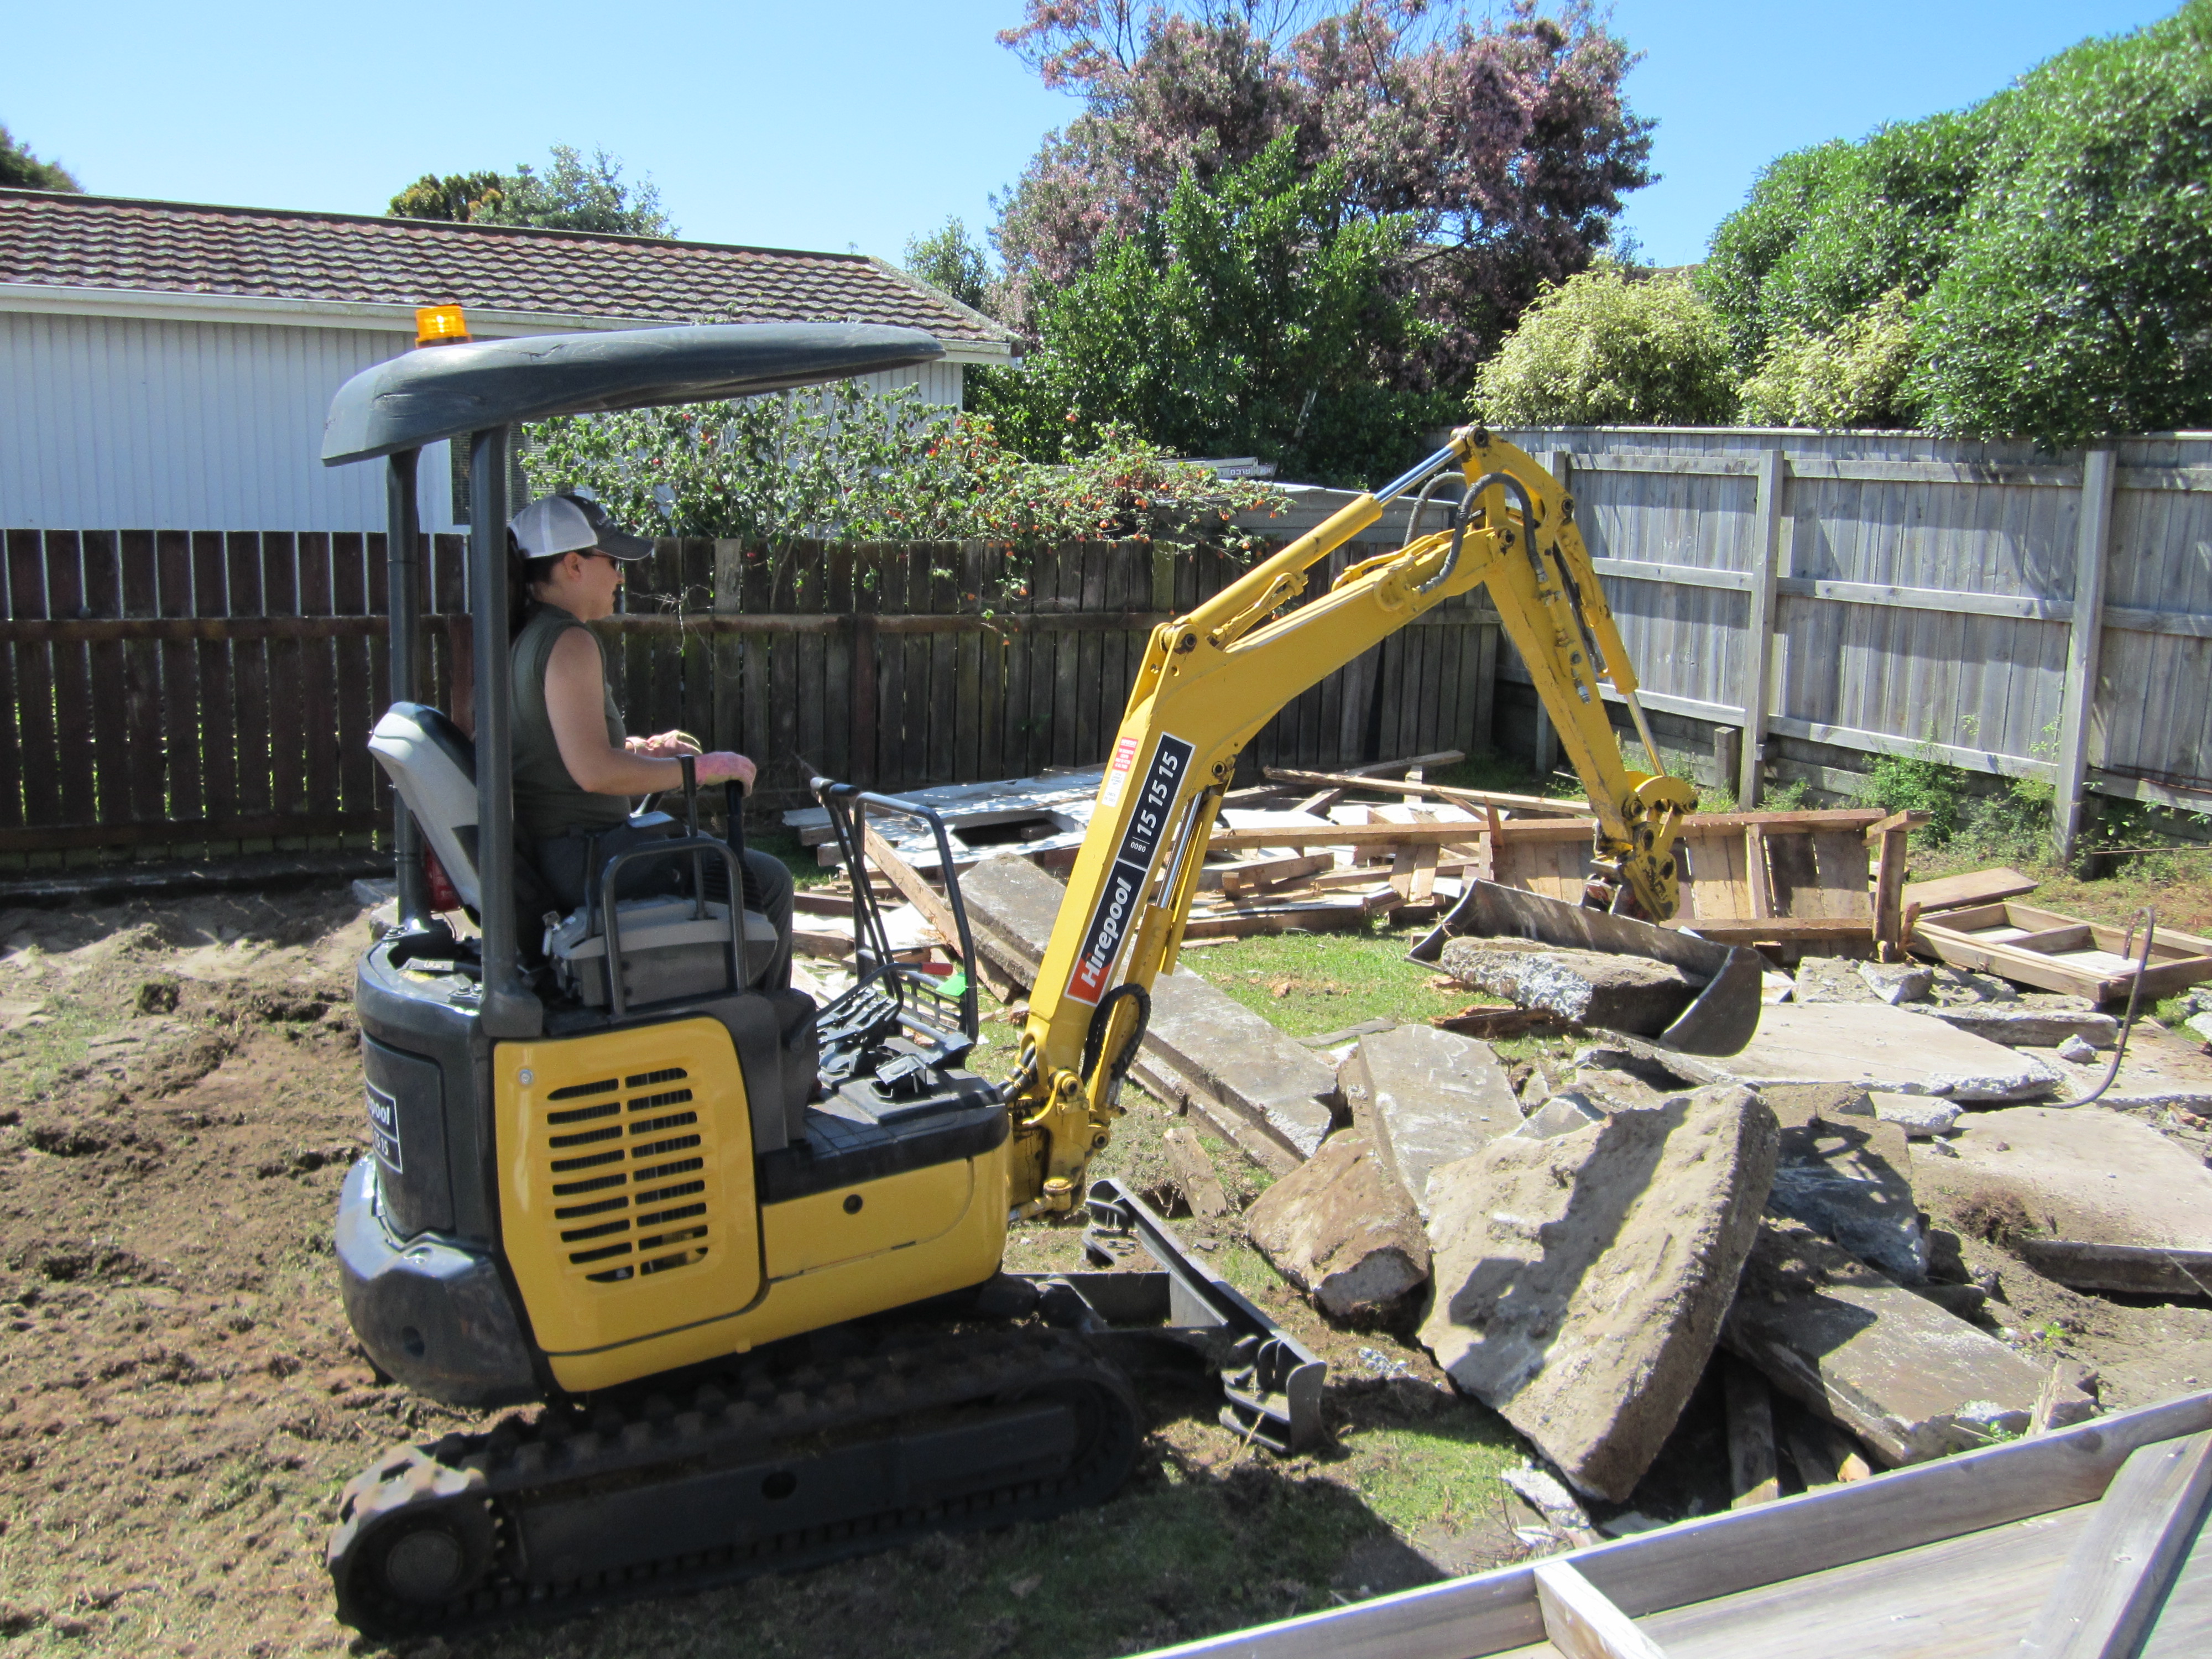
The next day, while Jess was at work, Ness decided to take on the job of installing the subfloor. After a full day of maneuvering, cutting, and fitting the pieces, all of the sheets were screwed down. Jess came home from work just in time to point her finger, boss a little bit, and put in about four screws. Project Bosser clearly has a rough life!

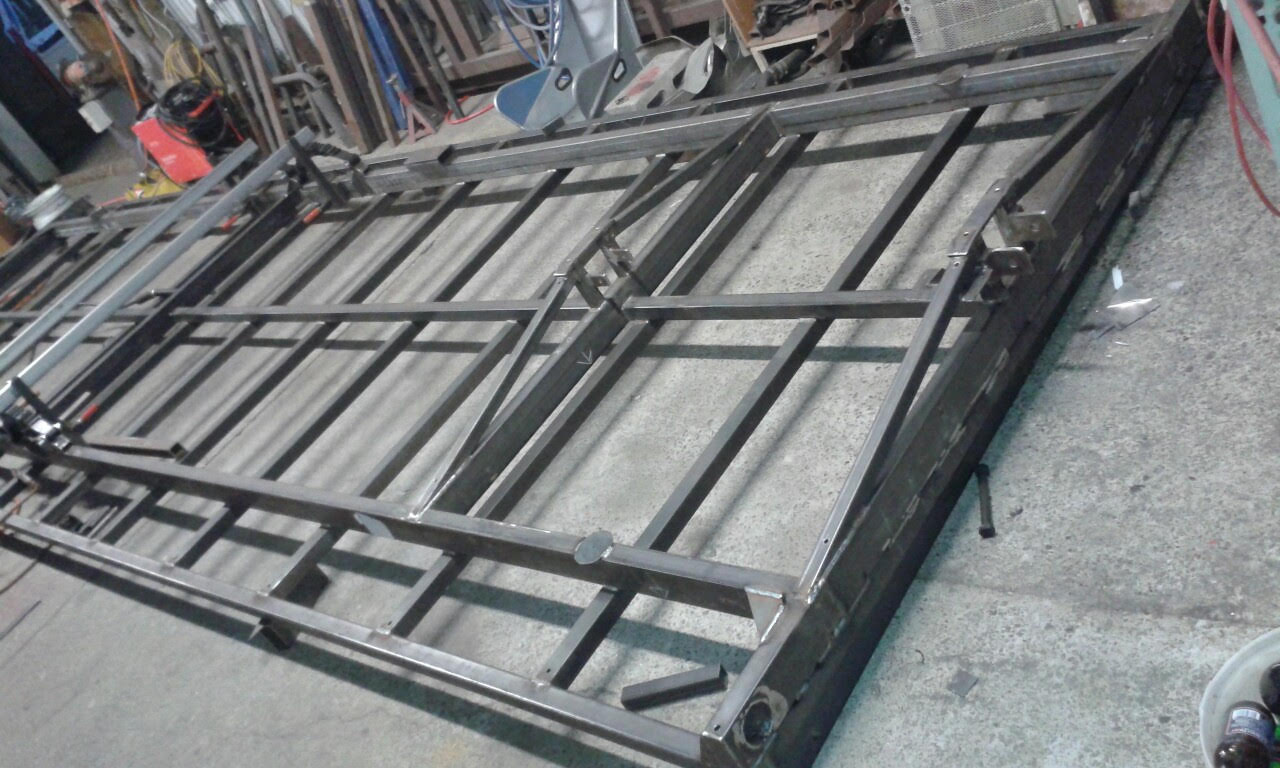
In between battling the rain, our creative wheels were always spinning and we made great use of the rainy days. We have been conversing back and forth with Frametek, a local steel framing company. After much research we decided to go with a steel frame over typical lumber framing for a few different reasons. The two main reasons we chose steel framing were price and weight. Steel framing is significantly cheaper than the cost of wood here in New Zealand. Overall, we saved exponentially on weight as well!!! And who can complain about shedding a few pounds 😉

After a few afternoons of back and forth designing and redesigning, we finally came to a solid design. Our design was converted into a 3D model.  We are so excited to see how it looks when it all comes together!

The front (left) and rear (right) views of our tiny house design.

Here is a little peek into our day trip to Frametek to see our frame being cut and pieced together.  A big shout out to Steve, Cameron, and Roger over at Frametek, these guys are awesome, if you ever get the chance to do business with them, tell them we sent you!

What’s next for TinyHousewives???

We will be making our trip to Frametek this week to have our steel frame installed on our trailer!!! Later this week, there will be more pictures and posts to follow. Thanks again for all of your love and support!!

           FTLogo

We Have a Trailer!!!!

Did I mention…..

WE HAVE A TRAILER!!!

Our tiny house trailer finally arrived and if you notice, it did not arrive when we expected it to….. back in October (A lesson we are beginning to learn very well…. Everything will take longer than expected, especially on Kiwi time!!!). Nonetheless, we had plenty to do in our “free time.” We took the time to level our spot and bring in some mulch. We also need to give a special thanks to Jess’s Dad, Jamie, for trimming the low hanging branches off the overgrown tree just above where we will have our tiny house.

photo 2 photo 1

What’s next???

Now that we have our tiny house trailer, we will be placing polystyrene insulation in the floor, and installing the subfloor. More photos and updates to follow! Thank you all for your kind words, your love, and support throughout this journey.

Happy Birthday Ness!!!

Today is Ness’s 28th birthday and oh what a birthday it has been! We have some catching up to do and need to fill you in on some of the back story. We were expecting to receive our tiny house trailer back in October and knew that there was some intense preparation that needed to be done before it arrived.

CutMetal Framewelded trailer

A few pictures of the workings and progress of our trailer in October.

There was a pretty decent slope in the area that we wanted to park our tiny house and we needed to level the ground out before receiving our trailer. We looked into renting a little dozer to help us with the work. After a full day of play and getting carried away demolishing our neighbor’s shed 🙂 we finally had a level spot.

IMG_5993IMG_5994IMG_5995IMG_6005

Some of the pictures from our day. The bottom right is a picture of the remnants of the neighbor’s shed.

We knew we needed to add rock, or some type of landscaping material, to keep the dirt pile we created from turning into a mud pit. The next day, we ventured out and bought some weed mat as well as some large bark mulch to beautify our mess. After a weekend full of work and play, our patch is now ready and willing to receive our tiny house trailer!


About Us – Tiny Housewives

This is Ness – Project Leader

20140826_160439

I have minimal building experience but a huge love and passion for repurposing. I have welded, sanded, painted, and rebuilt treasures. For the past few years, I got into researching and obsessing about tiny houses and tiny house living. With a background in biology, climate change research, and a love and understanding of the earth and our detrimental impacts on it, there were so many reasons I could think of for living tiny. After researching, talking and dreaming about tiny houses, we are finally going to do it!

This is Jess – Project Bosser

IMG_5010
I have absolutely no building experience, and to be honest I have never really had a desire to build my own house because I thought it would be too much hassle. BUT… I am fascinated with tiny house living. I want to live SMALL so we can live large 🙂

This is Shooter – Site Supervisor

IMG_5995

Shooter has no building experience but is efficient at supervising the site, and sitting on all essential building materials, to ensure their quality and sufficient contributions to the build. Shooter refuses to endorse work without his bark of approval!

Jess & Ness – Tiny Housewives

10353574_997607150804_8919049404556741827_n

This year, we decided to take on many new adventures, with our biggest one being our recent move to New Zealand. It took awhile for us to decide whether it was the right move for us and how we would actually do it. After a few weeks of discussing, a few hours alone, and one glass of wine, Jess booked our tickets! The race was on. There was so much to do once we decided to move countries…. Who knew?! But we made it safe and sound. We know that getting our feet on the ground and settling in to “Middle Earth” will be a transition and will take some time, but we are happy we made the move.

So many reasons have pointed us to tiny house living, including some trailing student debts. Because of these reasons, we have decided to go all in on our adventure of building our very own tiny house. With little to no experience collectively, it will indeed be an adventure! So here’s to sleepless nights, good wine, and an unpredictable adventure 🙂